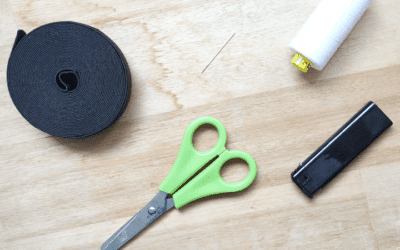
Left-handed people often have to adapt to a world designed for right-handers. While there are now some tools and accessories for left-handers—like scissors or notebooks—they’re still not the standard. In a typical office kitchen, for example, you can be almost certain that the scissors in the drawer are made for right-handed use. Right-handed people rarely notice these everyday obstacles.
But why should one conform to this norm in leisure activities?
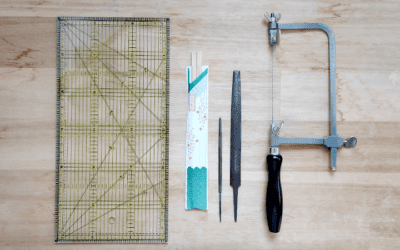
In many cases, a shamisen can simply be converted for left-handed playing. If the instrument doesn’t have an Azuma Sawari, it only requires a few straightforward steps that can be done at home:
1. Adjust the Kamigoma and Sawari
2. Re-string the instrument—drill new peg holes if necessary
3. Move the dōkake to the other side
Tradition and Convention
One common question I want to address first: Is this allowed?
My clear answer: With your own instrument, you can ultimately do what you want. However, if you want to join a traditional ensemble in Japan, a left-handed shamisen might stand out, especially on stage. Personally, I haven’t had that experience, so I can only speculate or rely on conversations with players in Japan.
One thing I know for sure: I wouldn’t enjoy playing right-handed if I were left-handed (except as a fun challenge). Likewise, I don’t see why a left-hander should have to play right-handed. My personal stance is simple: everything is optional—nothing is mandatory.
Step 1: Adjust the Kamigoma
The Kamigoma is the small golden bridge at the Tenjin, guiding the strings onto the fingerboard. It usually has a groove or indentation on the left side for the thick string. Since we’re moving the thick string to the other side, the Kamigoma also needs to be adapted so the characteristic buzzing (Sawari) remains audible.
You can carefully saw and file a brass Kamigoma with some patience. The easiest approach is to remove the existing Kamigoma (lifting it gently with a small knife) and use it as a template. This is by far the most labor-intensive step. If anyone needs detailed guidance here, feel free to email me.
Step 2: Re-stringing
The middle string (Ni no Ito) stays in place. The two outer strings—Ichi no Ito and San no Ito—swap sides. Even though the strings remain on the pegs they were originally on, this step can be tricky if they get tangled during the swap.
To avoid complications, it’s easiest to completely unwind the outer strings from the pegs. On the Neo, loosen the strings and reattach them in their new positions.
To ensure the strings have enough slack when rewound, I recommend drilling new holes in the corresponding pegs. The new hole should ideally not be on the side where the string will eventually rest. The simplest method is to mark the new hole location with a pencil while the peg is still in the Tenjin. Then remove the peg and create a small indentation at the mark with a nail or center punch, giving the drill bit a secure starting point. The peg can then be fixed in a jig for drilling, or placed back in the Tenjin to drill the hole in position. Always start with the smallest drill bit to prevent splintering or cracking the wood, and gradually enlarge the hole until the string fits.
Step 3: Move the Dōkake
Before restringing, move the Dōkake to the other side. The Dōkake always goes on the side of the Dō where the thick string points. If a self-adhesive Dōgomu is attached, it must be removed first so the Dōkake sits properly.
Step 4: Adjust the Sawari
With a simple Kamigoma, the Sawari is produced by lowering the thick string. The groove in the Kamigoma alone is usually insufficient; an additional notch in the wood is needed.
This is easiest with a fine triangular file. Place the file close to the pegbox and remove a small amount of wood at a shallow angle toward the fingerboard. Work slowly and carefully, checking progress by tightening the thick string and tuning it to C. Once you start hearing the characteristic buzz, you can file a little more to enhance the Sawari.
Optional Step 5: Attach the Dōgomu
Not everyone uses a self-adhesive rubber pad. If you’re using a loose rubber mat, you can skip this step entirely. Installing the Dōgomu is quick and straightforward.
Optional Step 6: Attach a Fujakustrip
If you use position markers, they must also be moved to the opposite side of the neck. A Fujakustrip generally cannot be reused. You’ll need a new strip or can place individual markers instead. One downside of a pre-made strip for a left-handed shamisen is that the numbers will be upside down.
Watch the video here: