Many of us can’t play shamisen at full volume at home—maybe the walls are thin, or practice time falls late at night.
A simple way to reduce the sound is by using a shinobikoma, a special mute bridge. You can buy one, of course, but if you’re short on cash, love DIY, or just need a solution right away, you can easily make one yourself as a full upcycling project. Below are two quick and easy versions.
Sound Differences
Homemade versions don’t mute quite as much as commercial ones, but they’re perfect if you need a quick solution.
Of the two designs introduced here, the tissue version is my favorite—it’s fast, requires no tools, and achieves a surprisingly good dampening effect. You can hear clear tonal differences between both versions in the video clips.
Get Creative
If you want to craft your own unique Shinobikoma or carve a long-lasting, high-quality one, it helps to understand why the mute works in the first place.
How Sound Dampening Works
A standard Shinobikoma is about as wide as the shamisen body and shaped like a bridge. Its feet rest on the wooden frame, while a hollow underside spans across the skin.
This directs the string vibrations into the wooden frame instead of the resonating skin, which reduces the instrument’s volume.
Another way to reduce resonance is to block vibration transfer. You can demonstrate this by laying your left hand flat on the front skin while plucking a string—the more surface area and pressure you apply, the duller the sound becomes. The same principle applies to the DIY versions.
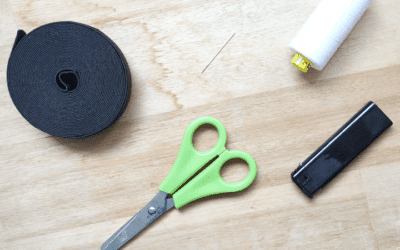
DIY Shinobikoma Version I — Chopstick Style
The first version replicates the plastic Shinobikoma using a disposable chopstick—those you often get with takeout or in restaurants. Their size and thickness match a standard koma well. Just wash and dry the stick after eating, and it’s ready for its second life.
Quick Version
For the fastest version, carve three small notches for the strings, and you’re ready to play. You can also use a pencil if you don’t have a chopstick.
Since chopsticks are longer than the dou is wide, this version can’t be used with a doukake (body cover). To keep your doukake on, shave one end of the stick flat or shorten it.
A standard Shinobikoma is about 16 cm long. Place the middle string notch in the center, and the other two 12 mm to the left and right. The thicker string sits on the side with the flattened foot—cut that notch a little deeper for stability.

You can make this version from a pencil too.

For a Tsugaru body, make the stick slightly longer.
Deluxe Version
For the deluxe version, hollow out the underside to mimic the structure of a real Shinobikoma. A file works best, but sandpaper or a knife will do.
Mark the “feet” about 20 mm from each end, then gradually remove material until you see a gentle curve.
Don’t overdo it—the soft wood can bend or break under string tension. The goal is minimal contact with the skin surface.

The difference is subtle to the eye but audible to the ear.

Soft wood may compress slightly under tension.
DIY Shinobikoma Version II — Tissue Style
For the second version, combine your regular koma with a tissue.
You only need a regular tissue and your normal koma. Tear or separate the tissue layers (two layers work best), roll them tightly, and place the roll under the strings right in front of the koma.
Placed in front, it mutes the sound significantly. The strings rest first on the roll, then on the koma.
If you prefer a lighter mute, place the roll behind the koma. It’s a bit trickier to position, but it produces a subtler tonal effect.
The tissue version is brilliant because tissues are always easy to find, no tools are needed, and you can easily adjust the level of dampening. Plus, using your usual koma keeps the same string height and tension feel.

Roll in front of the koma: strong muting effect.

The roll is placed directly in front of the koma.

Roll behind the koma: softer effect, slightly harder to place.

A little more finicky to insert, but the effect might be well worth the extra effort.
Direct Comparison
In direct comparison, you can clearly hear how each version changes the tone. The ideal level of dampening depends on your practice situation and preference. Experiment with both designs to find the sound and response that suit you best.
Watch the video here:

Newsletter abonnieren
Am Ende jeden Monats gibt es einen frischen Newsletter mit einer Übersicht aller neuen Artikel und Videos. Dazu gibt es alle anstehenden Terminen für den kommenden Monat. Plus hin und wieder ein nettes Schmankerl 🙂
Also: Gleich anmelden!