Assembling the Shamisen

Pretty Practical

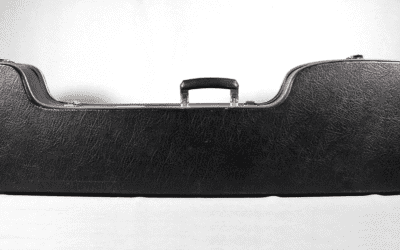
Most shamisen are built so that the neck can be taken apart into three pieces. That makes them surprisingly travel-friendly despite their long neck, and it also makes transport over longer distances much safer — plus it reduces shipping costs when the instrument is sent by mail. Cheaper models have a neck carved from a single piece that can’t be disassembled. And there are even a few instruments where the neck splits into more than three parts, but that’s unusual. The principle of assembly is the same in any case.

TerminologyA neck that splits into three pieces is called mitsuori neck (三つ折り – 三つ mitsu = three, 折り ori = fold).  Nobezao refers to a solid, continuous neck (延棹 – 延 nobe = extension, 棹 sao = pole/neck).

The first time you assemble a shamisen is the most work, since you really do have to fit together every small part. Later on, when you disassemble it for travel, you don’t need to break it back down into its “atomic” components — you just remove the neo together with the tied strings, then take apart the neck.

The Individual Parts

These are the pieces that remain permanently installed on a fully playable shamisen:
shamisen zusammenbauen einzeltele

Always included:

1: body (dou)

2: upper part of the neck with head (tenjin)

3: lower part of the neck

4: middle part of the neck

5: three tuning pegs (itomaki)

Not always included, but part of a ready-to-play shamisen:

6: string holder know (neo)

7: three strings (ito)

8: body cover (doukake)

When you buy a shamisen, sometimes the doukake, neo and strings aren’t included. The rest of the instrument can still be fully assembled — those three items are simply the final pieces of the puzzle.

The Best Assembly Order

There’s no single correct order, but mine looks like this:

  1. Fit the neck pieces together
  2. Insert the itomaki into the tenjin
  3. Attach the Doukake
  4. Put on the neo
  5. String the instrument

I start with the neck to get the fragile joints secured right away and out of harm’s way. It also makes pressing the lower neck piece firmly into the body much easier since you have more material to grip. I add the itomaki only after the neck is seated in the body, since otherwise they can work loose and fall out from all the handling. The dōkake may look like decoration, but it’s easier to tie the lower knot when the neo isn’t in the way. And the strap should never go over the neo, or the doukake won’t stay tight.
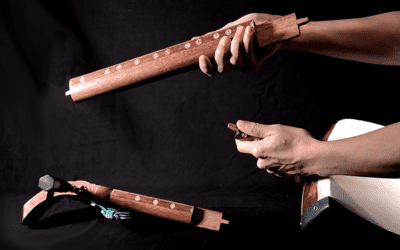
Warning signs: If something feels stuck, stop immediately and check. Just like in playing, nothing in assembly should feel like a strain — that’s usually a sign something’s not quite right.

The Neck

The one mistake you can make here is attaching the middle section upside down. Since the neck tapers, that creates an obvious step and usually leaves a noticeable gap between the joints.

The easy fix: when connecting the pieces, keep the rounded underside of the neck facing you. If you’ve fitted it wrong, you’ll see an ugly edge immediately on the underside. The top side can be deceptively smooth, tempting you to force it together against resistance.

Sao falschrum gesteckt

Wrong way round:
Rounded side on top → visible ridge
Straight side on bottom → deceptively smooth

Sao richtig zusammengesteckt

Correctly assembled:
Rounded side on bottom → smooth
Straight side on top → also smooth

If Something Jams

If pieces are stuck, don’t panic — and don’t reach for pliers. Use gentle patience: tap the joint lightly with your palm to loosen it, while using your other hand to cradle the lower piece and push the upper one away with your thumb. This trick also works when disassembling very tight joints.

Bei höherpreisigen Instrumenten genügt es übrigens, genau hinzuschauen, weil jede Verbindung unterschiedlich gearbeitet ist und man direkt sehen kann, was zusammengehört und was nicht. Trotzdem passiert es auch hier, dass man mal doch nicht so genau hinguckt und dann was falsch zusammensteckt und sich verhakt.

Sao falschrum gesteckt

All the joints look the same and could potentially fit together.

Sao richtig zusammengesteckt

The difference between the joints is obvious: They're not a match!

Neck Through the Body

Next, fit the neck through the square hole in the body. On the opposite side (with the round hole) the end of the neck will emerge. Since the dō has a front and back, you can insert the neck backwards if you’re not careful. Sometimes it seems to fit, sometimes it jams — it depends on the instrument. But if it’s backwards, the instrument won’t play properly.
eckiges loch am dou

Look closely: the square hole isn’t centered. On one side the distance to the edge is shorter — that’s the top side. Because of this asymmetry, the neck orientation matters, even if it “fits” the wrong way. A backwards neck makes the string action awkward or even unplayable.

Another clue: subtle marks around the hole where the neck presses against the wood. These look like a U-shaped curve on one side and a straight line on the other, like a lid on top of the U. The curved mark indicates the back side of the body, where the rounded underside of the neck sits. 

To insert: place the dou on your lap for stability. Carefully guide the neck straight through the square hole. Try not to let the end of the neck touch the skin — it can damage it. If you feel resistance, gently wiggle until the stem peeks out below, then press it in firmly. In the end there should be no gap between neck and body. Some instruments go together easily, others need more pressure, so check orientation first.

Terminology: Because the neck runs all the way through the body — literally skewering it — the shamisen is classified in Western Music as a “spiked lute.”

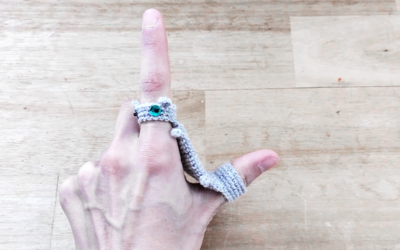
Itomaki in the Tenjin

Although the three itomaki look alike, each is custom-fitted and should go in its proper hole. Put in the wrong place, one might sit too tight to turn or too loose to hold tuning. Usually the first two pegs are marked, making it easy to match them. The arrangement in the tenjin is:
Sao falschrum gesteckt

Markings with dots are at the tip.

Sao richtig zusammengesteckt

Markings with grooves are on the side.

Sometimes there are no marks at all. In that case, trial and error is your only option — but you can reduce the guessing to 50/50. The first peg (for the thick string ichi no ito is easy to spot:
on one peg, the string hole is drilled further from the tip than on the other two. That one belongs in position 1, top right of the tenjin.
The other two have identical drilling, but usually one fits better in one hole than the other. Try both and choose the one that holds firmly but still turns smoothly.

Attach the Doukake

If you have doukake, neo and strings, start with the doukake. It protects the skin from sweat and oil and also gives your arm a surface with more grip than the smooth wood of the body. It belongs on the upper side of the body — for right-handed players, that’s the left side.
Press it firmly onto the body and tie the cords around the neck and the stem protruding from the bottom. For the lower knot, it often helps (especially with smooth cords) to wrap the cord once completely around the stem before tying. For the upper knot, make sure the neck is seated tight with no visible gap; otherwise the cord may slip into the gap and hurt the sound.

Adding the Neo

The neo simply slips over the piece of wood sticking out at the bottom of the dou. The smooth side faces the body, fitting snugly against it. The three small loops point upward, usually peeking slightly over the edge. 

Next Steps

Now it’s time to string the instrument. Check out how to do that in this article and this video After that, all that remains is to insert the koma (seearticle and video) and the shamisen is ready to tune. For safe and efficient tuning, without risking a broken peg (yes, it happens more easily than you’d think if you do it wrong!) read this article and watch this video. For more about the different tunings see this article and video.

Watch the video here:

Subscribe for the Newsletter


There's a monthly digest with an overview over all new articles and videos. Plus upcoming dates for the next month. And sometimes a little bonus extra 🙂

So go ahead and sign up!

Anmeldung erfolgreich!

This could be interesting for you, too: 

Shamisen auseinanderbauen

How to Disassemble the Shamisen

Many shamisen can be disassembled. That makes transport easier and safer. The fresher the joints, the harder the neck can be to separate. Luckily, there are a few tricks to get it done safely. This article shows you how.

Shamisen richtig aufbewahren

How to Store Your Shamisen Correctly

If you want to enjoy your instrument for as long as possible, think about proper storage. There are different ways to lay your instrument down safely and practically when you’re not playing. Even if you have little space, you’ll find a good spot for your shamisen.

Das Yubisuri

The Yubisuri

The yubisuri is a very practical little companion that rightly has a permanent place in every shamisen player’s case. What distinguishes the different models and how to find the right size — read about it here.

en_US

Pin It on Pinterest

Shamisen-Zentrale
shamisen zusammenbauen einzeltele
Sao falschrum gesteckt
Sao richtig zusammengesteckt
Sao falschrum gesteckt
Sao richtig zusammengesteckt
eckiges loch am dou
Sao falschrum gesteckt
Sao richtig zusammengesteckt
Shamisen auseinanderbauen
Shamisen richtig aufbewahren
Das Yubisuri
shamisen-zentrale logo
en_US
de_DE
en_US
Share This